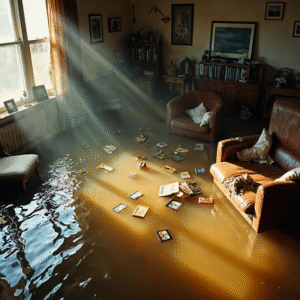
Water damage to the floor can be a huge headache for any homeowner. It can cause serious structural damage, create costly repairs, and even lead to health risks if not taken care of properly. Fortunately, there are some steps you can take to repair water damaged floors and restore them to their original condition. In this article, we will discuss the steps needed to repair water damaged floors and how you can prevent future damage from occurring.
One of the most distressing experiences you may have is not having your water damage repaired after substantial flooding or water damage in your home. Major issues can arise from leaking appliances, burst pipes, sewage backups and flooded basements.
Even worse, you can’t spend time on water damage restoration. Also, water damage may result in a number of structural problems and safety hazards that you might not notice until it’s too late. Such house water damage can result in significant monetary and personal losses.
Water ruins walls, floors, foundations, and furniture, and it can create mould and other serious health issues. Even with little water, mould can start to form in as little as twenty four hours. One can easily follow some major steps to save home from further damage and even if one needs any more water damage-related issues in such situations.
During this condition where water is all around one doesn’t get an idea where to start cleaning up and repairing. One of the home’s most crucial structural elements is the subfloor. By connecting the floor joists that span your basement area, it supports the first level. A level foundation for completed floors is provided by the subfloor, which creates an underlying plane for supporting walls.
Underfoot, a water damaged floor feels mushy. When you move across the room, it may bounce or squeak. Sagging boards, moist areas, and musty odours are all indicators of a deteriorating flooring. When this structural component becomes damp and damaged, one must immediately begin the drying and repair water damaged floor process.
12 Tips to Repair Water Damaged Floor
You must be wondering where to start and save the floor from further water damage? So here are given some major quick tips one need to follow immediately to repair water damaged floor.
Identify the source
Have you ever given any attention to the source of the water? You may stop the flow if a pipe is leaking by cutting off the water supply. Is it leaking through the fractures in the foundation?
To fix it in this situation, a professional plumber must be hired. Knowing the source of the water may also assist determine whether it is safe to consume and use the water. Even if having a broken pipe under your sink isn’t ideal, at least the water is pure. Floods brought on by sewage backlog cannot be the same.
Remove all the excess water
First thing you should do is turn off the main water valve to keep any further water from entering the room while you work. After that you should assess the immediate damage, you should rent a vacuum to get rid of any remaining stagnant water. You may use a vacuum, blowers, and your heat pump to dry any remaining puddles if there aren’t many.
Try to get flood water out of your property within twenty hours. This will aid in preventing substantial damage. The next task on the checklist is to gather all of your necessary supplies so that you won’t need to make further visits to the shop when cleaning up after a flood.
Tools needed to construct
To fix your flooring, you’ll need some specialized equipment. Gather the following things before moving on: Jigsaw, circular saw, handsaw, paintbrush, replacement wood joists, tape measure, construction glue, wood screws, inch plywood, and galvanized nails. eye protection, leather gloves, and floor levelling compound straightedge and pencil, construction square Cat’s paw and a hammer, Toilet repair ring or plate, Philips drill bit and drill.
Remove any residual mud or dirt
Once the standing water has been pumped out, grab your shovel, trash can, gloves, boots, and boots. Remember that muddy or wet dirt might weigh a lot. Throw any debris from the flood in the trash can to be moved outside of your house using the shovel. It may be disposed of by being dumped in your yard or being placed in a dirt dumpster.
Fill your rubbish can about halfway full so you can simply move the dirt outside without having to undertake difficult lifting. The majority of padded furniture must be placed in your trash along with any mattresses, box springs, and pillows.
Wooden furniture may have been able to be rescued depending on how high the water rose and how long it stood. Examine the wood in your furniture to see whether the water has affected the structural integrity. If so, it needs to be thrown away as well.
When you are done with all the above steps it’s time for repairing your floor and organizing your home once again.
Setup of the work area
Put on eye protection, leather gloves, and a dust mask before starting demolition to protect oneself. To create a space to work in, start by removing everything that is resting on top of the water damaged floor, such as cupboards, the toilet, etc.
Next, remove any protruding nails, the baseboards, and as much of the floor as has to be replaced with a pry bar. If the damage is confined, one only needs to remove that particular flooring; if it is more extensive, one might need to take out the entire room’s flooring.
Tear up ruined flooring
After a flood, carpeted carpets are sometimes impossible to clean. If water isn’t removed right away, it will soon seep through the carpet pad and harm the subfloor. Warped wood or concrete floors should also be torn up and thrown away. The set of instructions you need to follow will depend on the type of flooring you have.
The issue of how to rip out the carpet now emerges. To do it, grasp the carpet that surrounds the room’s perimeter with pliers and pull it away from the subfloor. One can also use a utility knife to cut the carpet into manageable parts. Pull the carpet matting from the flooring with care. Use a hammer, pry bar, and pliers to remove carpet tack strips and staples.
Remove any staples and nails
Floor planks should be sawed into narrow pieces no wider than three feet and don’t cut too deeply or you risk scoring the subfloor. After that, use the pry bar to lift the boards. Remove any staples and nails that were used to anchor flooring to the subfloor. Then, go to your subfloor to see if there are any structural problems or damage.
Close the crack and strengthen the joists
Plywood or oriented strand board should be cut to the precise measurements of your rectangle space, with notches added as necessary for the flange pipe. Install this new material with wood screws, allowing a space between it and the previous flooring.
Fill the gap with floor compound, level off any inconsistencies, and, if required, sand the area with a belt sander. Nail new wood over the rotting portions, making sure that each end is on top of sound wood, using wood that is the same size as the old joists.
Take out any damaged components
Cut new subflooring material to size using measurements. To allow for the new material’s expansion, leave some space between the old and new subflooring. The new subflooring should be secured down using deck screws or galvanized nails. Ones you are done with replacing the flooring, it’s time for removing all the damaged materials.
For that one can use a pry bar to lift water damaged floor or subfloor. To reduce splintering, move slowly. Remove any protruding nails, then discard everything in sturdy garbage bags. To remove any leftover dust or debris, use a shop vacuum.
Begin the cleanup procedure
Cleaning up after a flood requires a lot of time and effort. The water must be removed, personal possessions must be saved to the best of your ability, the space must be dried, and whatever the water touched must be cleaned.
One must carry out these tasks while using the proper safety gear, such as boots, gloves, a shovel, and a garbage can, in order to avoid coming into touch with microbes. Throw any debris from the flood in the trash can to be moved outside of your house using the shovel. It may be disposed of by being dumped in your yard or being placed in a dirt dumpster.
Remember that muddy or wet dirt might weigh a lot. Also, by combining two teaspoons of bleach with one to two gallons of water in a bucket, one may clean walls and prevent the growth of mould. To avoid over-wetting the surface, use a stiff-bristled brush or wring out your towel before each use.
Quicken up drying process
During floor repair, one must look for the growth of mould as it can easily be grown within one day if water is not removed and space is not dried up. Long-term concerns, such as mould produced by attic moisture, may have begun to grow at that time.
If mould or mildew are discovered, continue with extreme caution. All varieties of mildew are toxic to humans and extremely harmful to the objects they infest. If the mildew is small, remove the affected item, wrap it, and dispose of it quickly.
Let a few days for impacted areas to dry before proceeding with repairs. Otherwise, mould might form on moist things. A dehumidifier and many huge box fans speed up the drying process.
Reorganize and ventilate your house
Last but not least, if the house isn’t adequately dried out, moisture may recur after you’ve protected your possessions and repaired it. Ventilation may be increased by adding dehumidifiers, electric fans, and opening doors and windows to allow for a cross breeze.
After it is safe to resume the electricity, it is best to run the air conditioner continuously to remove as much moisture as possible. Similarly, some homes include attic fans that may eradicate humidity throughout the whole structure.
Underfoot, a water damaged flooring feels mushy. When you move across the room, it may bounce or squeak. Sagging boards, moist areas, and musty odours are all indicators of a deteriorating flooring. You may be able to prevent subfloor repair if you begin the drying process quickly after the first water damage. It is preferable to leave the existing damage to repair specialists.
Drying the flooring after a flood can be challenging in situations of substantial water damage, complicating repairs. Mould and rot grow fast in soaked wood, affecting neighboring framing and drywall. In this case, it’s advisable to replace the entire expanse.
Once you are done with floor repair and have organized the home. The next step should be replacing your old plumbing system with a new one. Either floor is damaged by bursting pipeline, leakage or flood.
Such amounts of water have not only affected the floor but also other materials as well. In such scenarios, one may know and can follow the tips given to restore their home, but still one always needs some expert advice to save their home from further damage. Due to cost restraints, some people prefer not to engage a professional plumber or flood damage specialist.
Even though they demand a higher fee, their services are valuable since they deliver long-term and successful solutions. Working with an expert assures that the task is done correctly and that there will be no problems in the future.


